
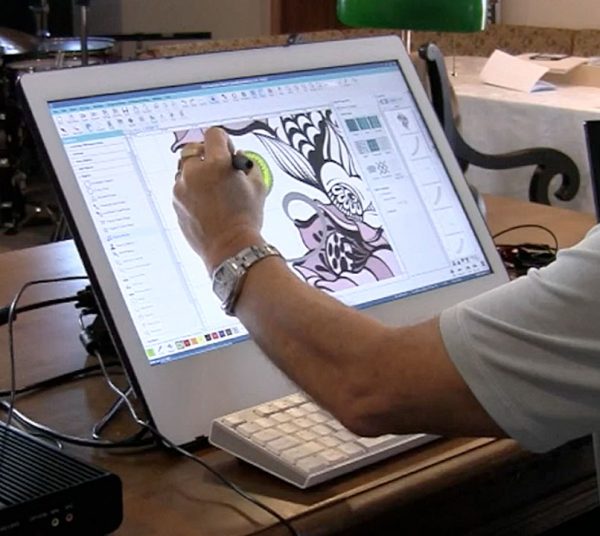
You have a logo that represents your brand. It exists as a JPG on your website, a PNG in your marketing materials, or a vector file from your graphic designer. Now you want to stitch that logo onto uniforms, hats, or promotional items using your older Pfaff or Husqvarna Viking machine. But these machines speak a language that modern image files do not understand. They need VIP files. Learning how to Convert Logo to VIP Embroidery File is essential for breathing new life into these reliable vintage workhorses.
VIP is a legacy embroidery format used by Pfaff and Husqvarna Viking machines after their merger in the late 1990s . It contains stitch commands that tell your machine where to place every needle penetration, what direction stitches take, and when to change thread colors . While newer machines have moved to VP3 and VP4 formats, VIP remains essential for owners of older equipment that still stitches beautifully.
Let me walk you through everything you need to know to convert your logo to VIP, whether you start with JPG, PNG, or vector artwork.

Understanding the VIP Format
Before we dive into conversion methods, you need to understand what VIP actually is. VIP stands for a proprietary embroidery format developed after the Husqvarna-Viking and Pfaff merger . It served as the native design file for many machines in the late 1990s and early 2000s.
Here is what you need to know about VIP files:
-
They contain stitch data, not images
-
They work with older Pfaff Creative series and Husqvarna Viking machines
-
They are considered a legacy format today, replaced by VP3 and VP4
-
They offer limited editing capabilities compared to modern formats
-
They store stitch coordinates, color change information, and basic embroidery data
If you own a newer Pfaff machine like the Creative Icon or modern Viking models, you probably need VP3 or VP4 instead of VIP . Check your machine manual to confirm which format it uses.
Why Source Format Matters
The quality of your final VIP file depends heavily on the quality of your source artwork. Different source formats have different strengths.
JPG and PNG files are raster images made of pixels. They work for simple designs but have limitations. JPG compression can introduce artifacts that confuse digitizing software. PNGs preserve edges better but still pixelate when enlarged. For best results with raster images, use the highest resolution available, at least 300 DPI at your final stitch size .
Vector files like AI, EPS, PDF, and SVG are ideal for embroidery digitizing. They use mathematical paths instead of pixels, so they scale infinitely without losing quality . They contain clean edges that digitizing software can interpret accurately. If you have vector artwork from a graphic designer, you have the best possible starting point.
Physical artwork like sketches or printed logos can also be converted. You will need to scan them at high resolution, then treat them as raster images for digitizing.
Method 1: Professional Digitizing Services (Easiest and Most Reliable)
For most embroiderers, professional digitizing services offer the fastest, most reliable path to perfect VIP files. Companies like Absolute Digitizing, Digitizing Buddy, Cool Embroidery Design, and Absolute Digitizer have experience with legacy formats and can handle any source material.
Here is how it works:
-
You upload your logo in whatever format you have (JPG, PNG, AI, etc.)
-
You specify that you need a VIP file for your Pfaff or Husqvarna Viking machine
-
You provide the desired size and fabric type
-
A professional digitizer manually creates your VIP file using industry-standard software
-
You receive your file, usually within 2 to 24 hours depending on urgency
-
You load it onto your machine and stitch
Total active time on your end: about 5 minutes. The digitizer handles all the complex decisions about stitch types, underlay, density, and pathing. You get a file engineered to run perfectly on your vintage machine.
Why this method works for any source format: Professional digitizers are trained to work with whatever you send. They can clean up low-quality JPGs, extract clean paths from vectors, and make intelligent decisions about how to translate your artwork into stitches. Their experience ensures accurate results regardless of source quality.
Prices start around $10-15 for simple designs, making this affordable for businesses and hobbyists alike.
Method 2: Professional Digitizing Software (For DIY Control)
If you prefer to handle conversions yourself and have time to learn, professional software gives you complete control. Several programs support VIP export.
Wilcom Embroidery Studio is the industry standard for professional digitizing . It supports a wide range of formats, including VIP, and offers complete control over every stitch parameter. The learning curve is steep, and the price reflects its professional status.
Hatch Embroidery provides powerful digitizing tools at a more accessible price point . It supports VIP export and offers both auto and manual digitizing features. Many small businesses choose Hatch for their digitizing needs.
Embrilliance offers modular software that runs on both Mac and Windows. Embrilliance StitchArtist provides manual digitizing tools, and with the right modules, you can export to VIP format.
SewArt and Embird also support VIP conversion, though they may require additional modules or configuration.
The process involves:
-
Importing your source image (JPG, PNG, or vector) into the software
-
Setting your design dimensions
-
Digitizing manually or using auto-trace tools
-
Assigning stitch types to each element
-
Adding underlay and adjusting density
-
Setting pull compensation

-
Optimizing stitch paths and color sequences
-
Exporting as VIP
Advantages: Complete control over the final result. Once you learn the software, you can create files for any project.
Disadvantages: Significant learning curve. Software costs from hundreds to thousands of dollars. For occasional conversions, the investment may not make sense.
Method 3: Converting from Other Embroidery Formats
Sometimes you already have an embroidery file in another format like DST or PES and simply need it converted to VIP. This is the easiest scenario if you have a compatible file.
Wilcom TrueSizer offers free viewing and basic conversion capabilities. You can open DST or PES files and save them as VIP.
Embrilliance Essentials opens various formats and exports to VIP.
SewWhat-Pro converts between many embroidery formats at an affordable price.
Important caveat: Conversion software translates the format, not the quality. If your source file is poorly digitized with wrong densities or missing underlay, the VIP file will inherit those same problems . This method works best when you already have high-quality files in other formats.
Step-by-Step: Converting from JPG or PNG
If you are starting with a JPG or PNG and want to create a VIP file yourself, here is the workflow.
Step 1: Prepare Your Image
Open your image in photo editing software. Crop to the logo area. Adjust contrast to sharpen edges if needed. Reduce colors to a manageable number (2-6 is ideal for most designs). Save as a high-resolution PNG for best results.
Step 2: Import into Digitizing Software
Open your digitizing software and import the image. Set your workspace to your final stitch dimensions. Left chest logos typically run 3-4 inches wide. Hat fronts run about 2.2 inches tall by 4.5 inches wide.
Step 3: Trace or Auto-Digitize
Use your software’s tracing tools to convert the image to stitchable elements. Auto-digitizing can create a rough draft, but you will need to manually refine the results.
Step 4: Assign Stitch Types
For each element, decide which stitch type works best:
-
Satin stitches for borders, text, and narrow columns
-
Fill stitches for large solid areas
-
Running stitches for fine lines and underlay
Step 5: Adjust Parameters
Set stitch directions for optimal appearance. Add underlay appropriate for your fabric. Adjust density based on material. Apply pull compensation to account for fabric distortion.
Step 6: Optimize Path and Sequence
Plan the order of colors and stitch path for efficiency. Group similar colors together. Minimize trims and jumps.
Step 7: Preview and Simulate
Use your software’s stitch simulator to watch the design sew in sequence. Look for problems like unnecessary jumps or inefficient pathing. Fix any issues.
Step 8: Export as VIP
Export your finished design as a VIP file. Save a working copy in your software’s native format for future edits.
Step 9: Test Stitch
Always run a test sew-out on scrap fabric before production. Check for tension issues, registration problems, and overall appearance. Make adjustments if needed.
Step-by-Step: Converting from Vector Art
Vector art gives you the best possible starting point for digitizing.
Step 1: Prepare Your Vector File
Open your vector file in Illustrator, Inkscape, or your preferred vector software. Ensure all text is converted to outlines. Simplify any overly complex paths. Reduce colors to embroidery-friendly numbers. Save as AI, SVG, or EPS.
Step 2: Import into Digitizing Software
Import your vector file into your digitizing software. Set your workspace to final stitch dimensions.
Step 3: Use Vector Paths for Digitizing
Most digitizing software can directly use vector paths as the basis for stitches. This saves time and ensures accuracy. You may need to assign stitch types and adjust parameters, but the basic shapes are already defined.
Step 4-9: Follow the same steps as above
Assign stitch types, adjust parameters, optimize paths, preview, export, and test.
Common Mistakes to Avoid
Skipping the test stitch. This is the most common and costly mistake. One test sew-out on scrap fabric saves hours of frustration and ruined garments.
Using wrong size. A design digitized for 4 inches will not scale well to 2 inches. Always create files at your final size.
Ignoring fabric type. Different fabrics need different underlay and density. Adjust for your specific material.
Overcomplicating designs. More colors and details mean more thread changes and potential problems. Simplify when possible.
Trusting free online converters. These tools produce files that look okay on screen but fail on fabric. Avoid them for commercial work.
When VIP Is the Right Choice
VIP serves specific machines well, but it is not the best format for every situation. If you own an older Pfaff or Husqvarna Viking machine, VIP is essential. If you have newer equipment, VP3 or VP4 will serve you better.
If you plan to upgrade machines in the future, consider creating VP3 versions of your designs alongside VIP. This future-proofs your work and ensures compatibility with newer equipment.
Conclusion
Converting your logo to a VIP embroidery file from JPG, PNG, or vector art is essential for owners of older Pfaff and Husqvarna Viking machines. The easiest and most reliable path is professional digitizing services like Absolute Digitizing, Digitizing Buddy, Cool Embroidery Design, and Absolute Digitizer. You upload your artwork, they handle the complex work, and you receive a perfect VIP file in hours.
If you prefer to digitize yourself, software options like Wilcom, Hatch, and Embrilliance give you control but require significant time investment to master. Converting from existing embroidery files using tools like TrueSizer works when you already have quality files in other formats.
Whichever path you choose, remember the fundamentals. Start with the cleanest artwork possible. Specify correct dimensions. Note your fabric type. Test before production. These principles apply whether you digitize yourself or hire professionals.
Your older Pfaff or Viking machine can still produce beautiful work. Feed it properly converted VIP files, and it will reward you with smooth stitching and professional results for years to come.